Authentication of an API request made by your application takes place by passing an API key and a bearer token. Once the application has been created, you will be granted an API key. This API Key is then used to delegate access for your application without the exchange of account passwords etc.
Overview
Web App
-
The 'Redirect URI' is used as part of the OAuth 2.0 authentication process. When your application needs authorization to carry out an action on behalf of a user, your application will first redirect the user to an Imagen URL where the user will be informed what actions may be carried out by your application. If the user authorizes your application, then Imagen will return an authorization code as a query string parameter to the 'Redirect URI' that you provide here. Your application must then convert the authorization code into an access token that your application uses to make an authorized call to the Imagen REST API.
-
If you are creating a web application, set the Application type to ‘Web’ and set the Redirect URI to a secure URL provided by your application. Imagen must be able to resolve this URL to an address that it can reach and the URL must begin with https://.
-
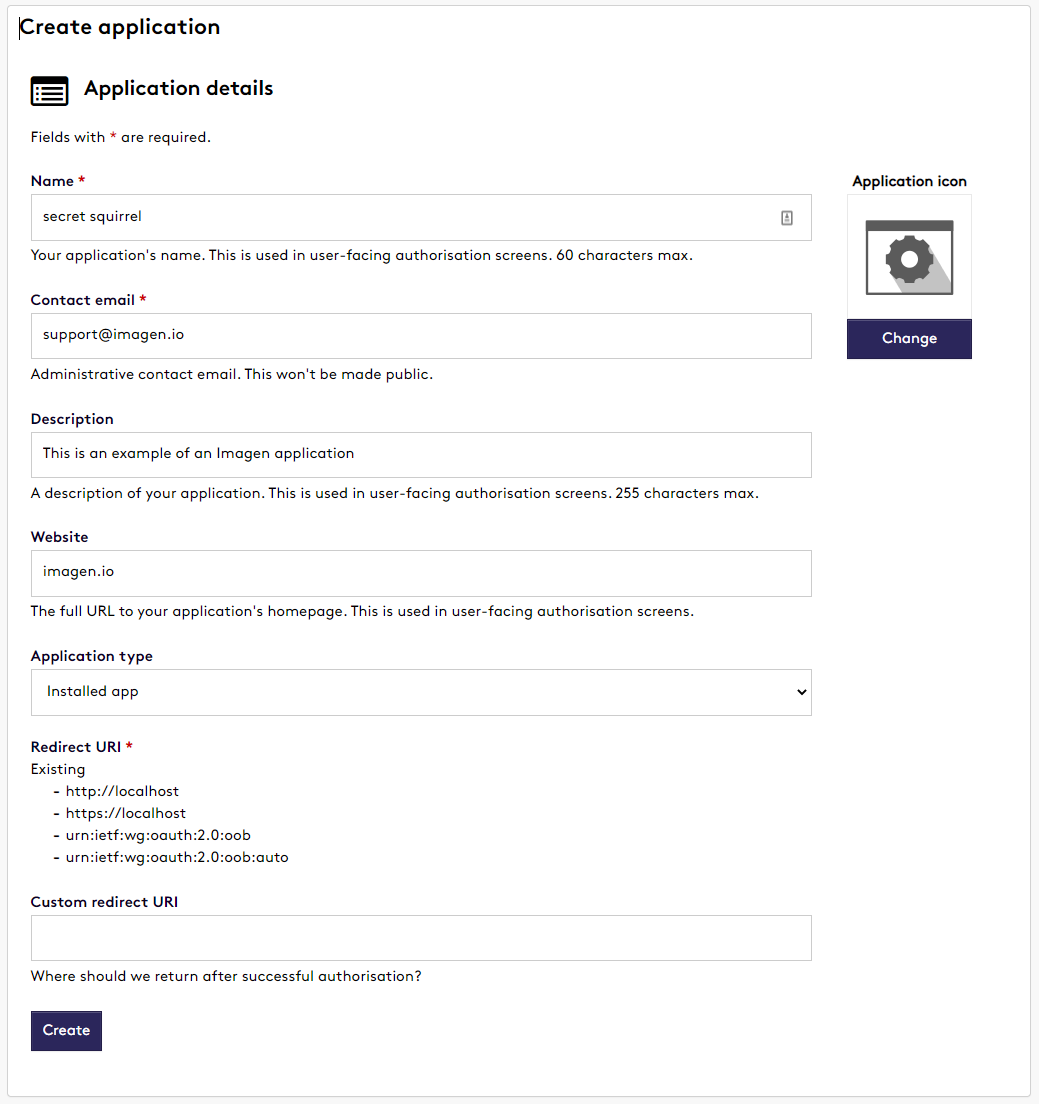
If you are creating an installed application, for example, a desktop application, then set the Application type to 'Installed app'.
If your application uses one of the reserved URIs, which will be displayed when you select 'Installed app' then leave the Custom redirect URI field blank. If your application has a custom URI scheme, then enter the custom URI in the 'Custom redirect URI' field.
Explaining the reserved Custom redirect URIs
-
http://localhost: The authorization code will be returned as a query string parameter to a locally hosted website running on port 80.
-
urn:ietf:wg:oauth:2.0:oob: The authorization code will be returned in the title bar of the browser, with the page text prompting the user to copy the code and paste it in the application.
-
urn:ietf:wg:oauth:2.0:oob:auto: Identical to urn:ietf:wg:oauth:2.0:oob, but the text in the confirmation page won't instruct the user to copy the authorization code, but instead will simply ask the user to close the window.
-
-
-
Select the 'Create' link to create your new application. Once created, you can select the application from your applications page and review or edit the information that you have entered. You will also see the unique credentials that have been generated for your application. A link is provided for you to download the application data, including the credentials, as a JSON file. You can also select a link to preview the authorization page that will be presented to users of your application.
Walkthrough Guide
Installed Application
To create your application, please fill out the details in the form below.
You will now be granted an API Key and secret access token. You will need to copy the API key for the next section:

👉 Next, learn about authenticating your installed app